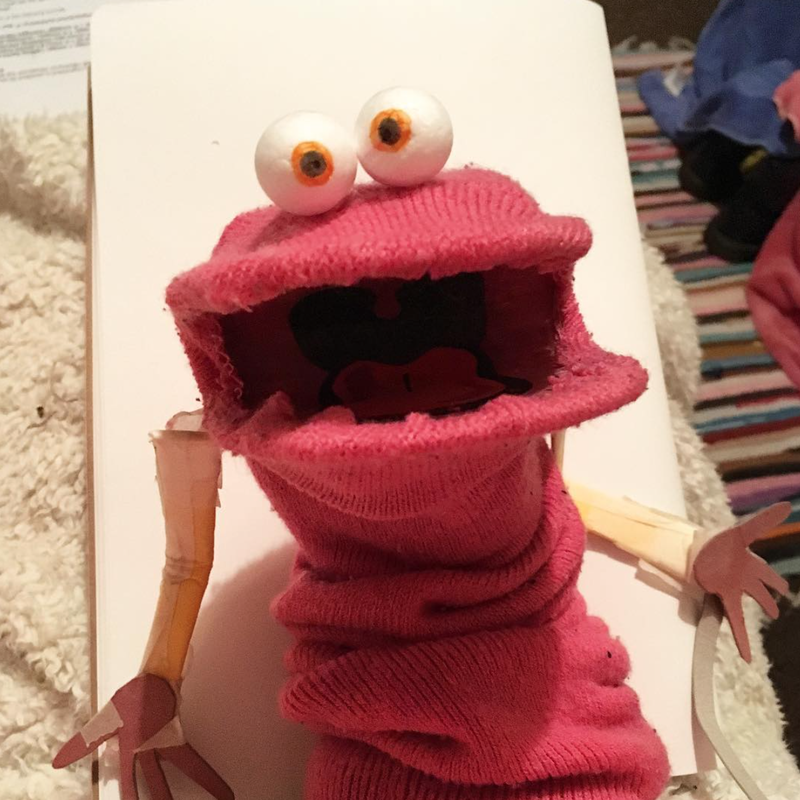
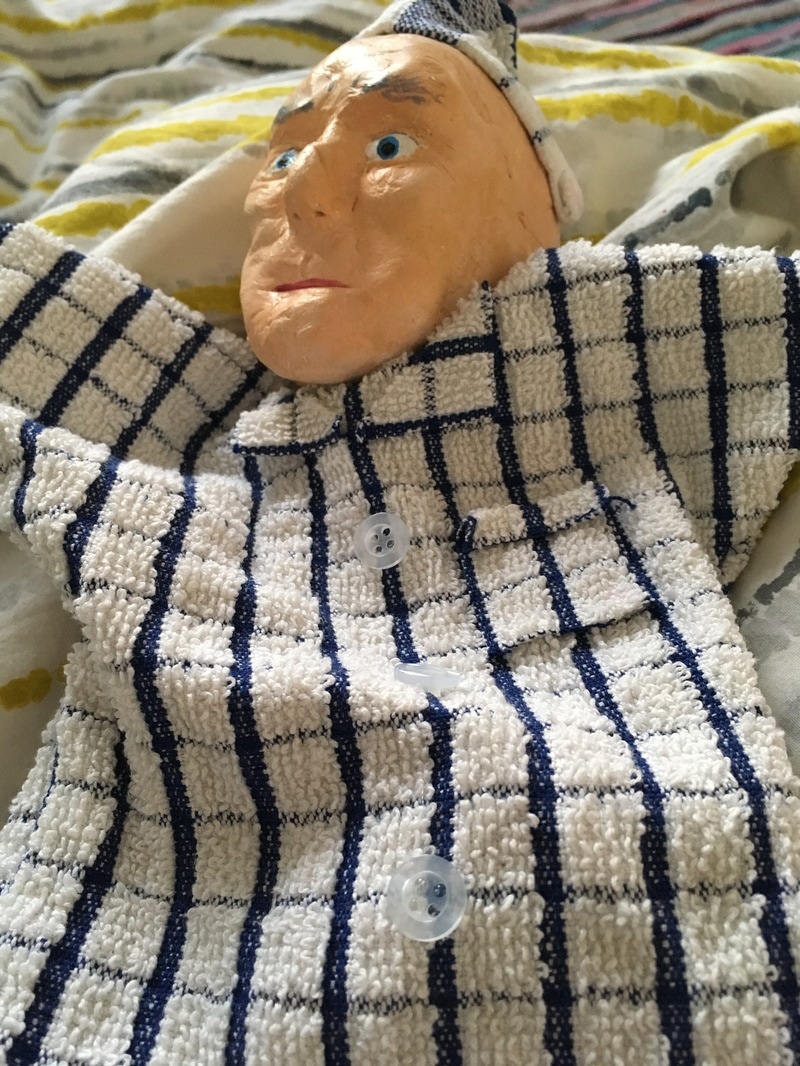
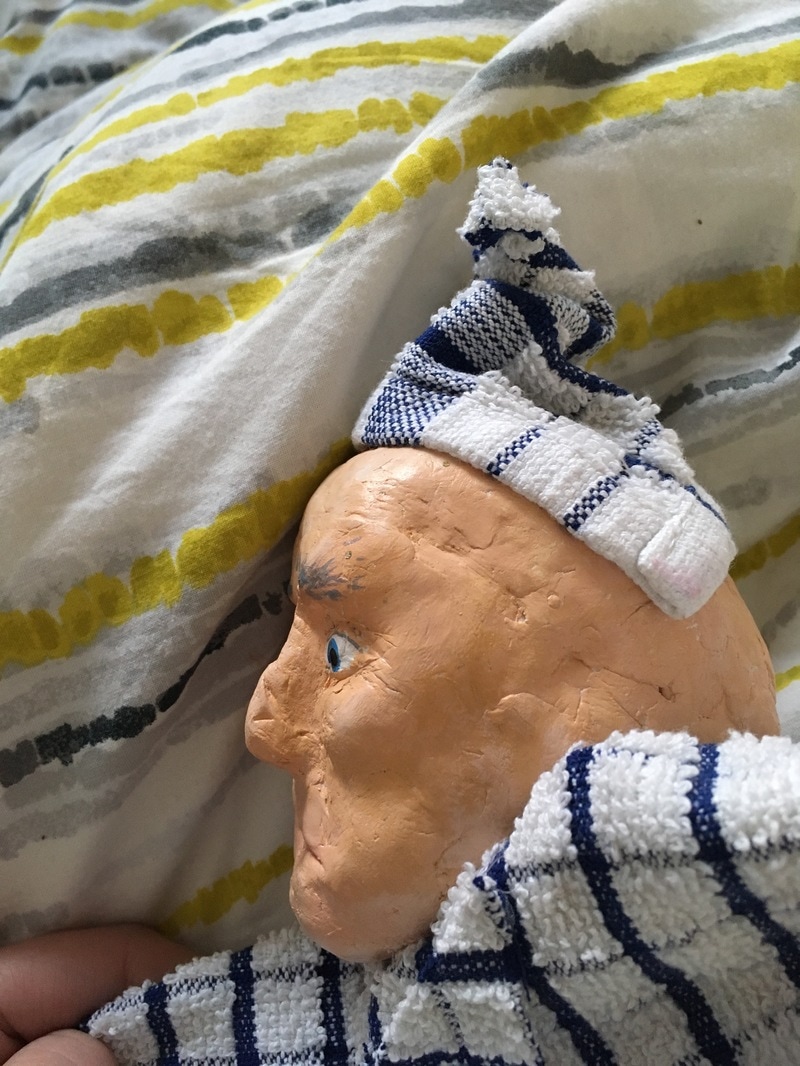
 1. Sock Puppet. I chose this sock puppet as one of my final three puppets as I really like the simplicity of it and yet how effective the character can be. Not only this, but I feel that because it was one of the first puppets I made on the module, it shows a starting point as from this point the puppets began to need more skill and attention. 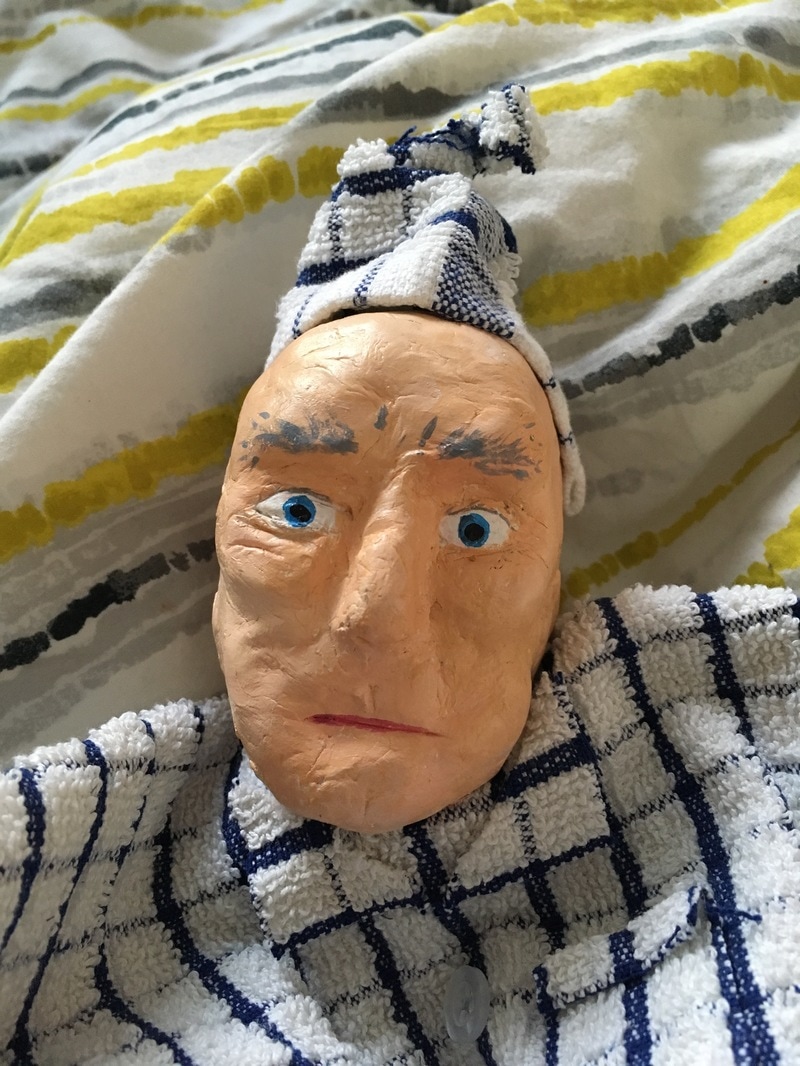 2. Hand Puppet. I particularly liked this puppet as I feel that I learnt a lot from the process of making it. Because it started out as the small foam puppet, I chose to model over the foam using polymer clay which gave it a smoother, more realistic finish and this also allowed the paint to dry with a better finish. Not only this, but I was able to see through this puppet how a character could develop - it started life as a happy elderly woman and ended as a Scrooge-like elderly man in his pyjamas. I also enjoyed making the the clothes out of such a simple shape and material and seeing how this added to the character. 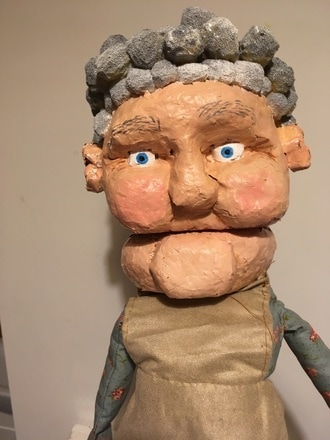 3. Large Foam Puppet (Maud).
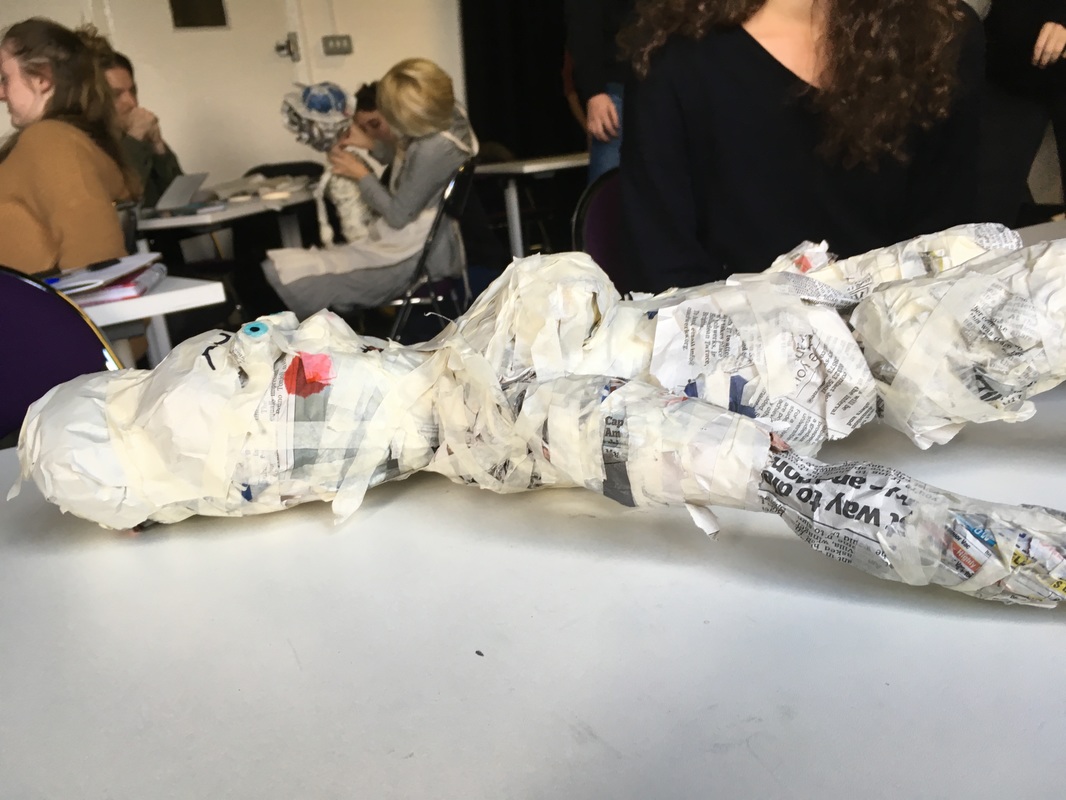
I seem to have become quite attached to Maud in particular. Out of all of the puppets I've made over the past few months, I feel that I definitely invested the most time into making her. The process of carving her foam head was by far my favourite out of the different techniques that we have tried and I really like the finish that using paper-mache has given her surface.
0 Comments
Anti AssociationI found the 'anti-association' exercise one of the most challenging. The first thing we did was sit in pairs in opposite directions but so that our ears were side by side. We then had to whisper a word in our partners ear, they could only reply with something that was totally unrelated. This then repeated itself until someone made a mistake. I found that the more I thought about what I was trying to say, the harder the exercise became and the more difficult it was to think of a totally unrelated word. Because of this I found myself trying to think of a word to say before it was even my turn however, I found that this put even more pressure on the situation and made me panic and again, unable to think of anything to say. The idea was to keep as calm as possible, and more than anything else, try not to over think. Just say the first thing that came into your mind. Glove Puppet PerformancesThe glove puppet performances help us learn how to manipulate and perform with these types of puppets. The sketches were mainly improvised so we didn't worry too much about what was going on so we could therefore focus on how we were using the puppet and what we were doing wrong and how we could improve it. We looked at elements of the performances such as how we were making our puppets talk. We saw how you should try and only move the bottom jaw of the puppet when making it talk so that it looks more life like and natural. As well as this, by making the mouth movements more exaggerated it became easier to speak with the puppet. Other tips included making sure that your arm was up straight when the glove puppet was on your hand so you know exactly where you are making it look and rather than looking at the audience, make sure that you are looking at you puppet at all times so that it almost becomes an extension of you and your aware of everything that you are making that puppet do. Hand SlapsThe hand slapping game had two parts. In pairs you both played your hands out in front of you. Taking it in turns, you'd try and slap the other persons hands without breaking eye contact. If they flinched and you hadn't slapped them, they lose. If you were to miss when trying to slap them, you'd lose. The second part of this game is almost the same only this time you'd have your hands by your sides instead of out in front of you. This exercise was all about reading the other person and trying to anticipate their move before they slapped you. Newspaper Improvisation and AccentsIn small group, we took it in turns to read a chosen article out from a newspaper. The other people in our groups would then instruct us on how to read the article out. For example, the could ask us to read it in different accents, talk louder or softer, fast or slower. Some people took to this very well, whilst others like myself struggled with it. I found it hard to read aloud anyway but when you have people asking you to change your voice whilst your reading it I found it quite hard to concentrate on doing both. Not only this, but I am also not very good at putting on accents however it was fairly amusing to both myself and the other people in my group when I tried. MimingFor this miming exercise, we were in groups of four people. One by one, we took it in turns to stand facing away from the rest of the group whilst they got into a position that could potentially tell a story. Once they were held in a 'freeze frame' the person standing away from the group was allowed to turn around and look at the freeze frame, but only for a second. They then had to close their eyes and answer questions about what was happening and what they saw from the people who were originally in the freeze frame. Intriguingly, sometimes the person with their eyes shut picked up on the smaller details of the pose but couldn't remember how many people were in it or what more than possibly one or two people were doing in the pose. They'd focus on giving this a back story then, if asked about the others, they'd have to think of a way to bring it in with what they were saying. When being asked about the pose, I found that you had to improvise quickly, without giving it too much thought otherwise you'd just complicate it for yourself as well as everyone else. CharadesCharades took place in teams. One member of the team would be given a film title from Matt and they would then have to act it out, without using any sound, to their team within a set amount of time. If their team couldn't guess it before the time was up, their opposition could have a turn to guess, if they guessed correctly, they would win the point from that round. We saw that the nearer you got to the end of your time, the bigger the gestures that were being made got as the player would try to simplify their actions as much as possible. There were a few examples of films where the 'actor' had never seen the film and had no idea how to give any clues so they would be left to act the film title out word by word and hope for the best. Clumps (Pictionary)Clumps is fairly similar to Pictionary. In pairs, we'd take it in turns to get a word given to us by Matt from a list. You'd then have to draw the word you were given and only allowed to move onto the next word once your partner had guessed correctly. This became an extremely competitive game very quickly. It tested our non verbal communication skills and it was also interesting to see how different people interpreted different words. We saw that by keeping the drawings as simple as possible, it made it quicker to not only give your partner more clues, but it also often made it much simpler to guess. Animating Found ObjectsEach person within our puppetry group bought in a small object. These ranged from sets of keys, to a tiny clog and an air freshener. Putting each of these objects on a table in the middle of the room, we each picked a single object at a time to experiment with. We discovered how we could 'animate' these objects to make them move, whether that would be flying through the air or jumping on the ground and what sort of noises would suit these otherwise inanimate objects. At first there was a sense of embarrassment throughout the group, with some members being more willing than others to make what they thought a toilet roll should sound like. However, after a while, things seems to drop into place, how we were moving the objects seemed to suit them more and more and whilst everyone was making strange noises to represent their objects, it became much less embarrassing. This was an interesting exercise as we really learnt how much we could do with an object that has no facial features, no limbs or for that matter, isn't even seen as a proper character. Swapping ChairsThis activity required a lot of concentration as well as communication between the people playing. Everyone in the room was sat on a chair, apart from one person who would have to stand up. The standing person would have to aim to sit down on the one remaining chair however, the people who were sitting down had to try and to avoid this from happening by moving seats to sit in the spare chair. This meant that at any one time, there was always a spare chair some where in the room. The sitting people could only move one at a time and the standing person could end up running around the room aiming for the spare chair. For the sitting people, it was all a matter of communication, mainly through the use of eye contact to make sure that if they were to move, they would be the one to reach the seat first. This was such a fast moving exercise you really had to concentrate on what was happening and work with the people around you.
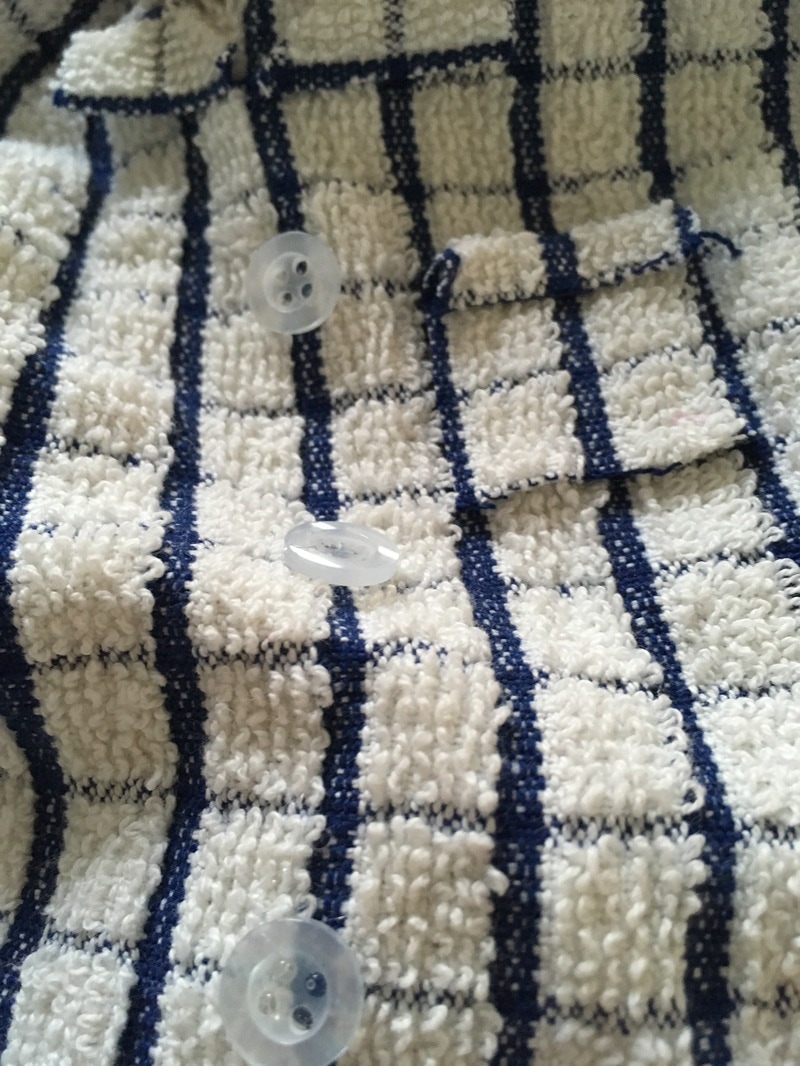
I wanted to improve my small foam puppet to a better standard. I didn't like the finish that had been created by painting straight onto the foam and I felt that I had rushed it to a point where I knew I could create a more aesthetically pleasing puppet. To begin to start this improvement, I used 'Polymer' clay and shaped it around the existing foam head. by doing this, I knew I could reshape some of the feature such as the eyes and the nose to make them look more suitable whilst keeping others that I felt suited the character such as the mouth and the cheek bones. As I was sculpting this, I decided that it felt like more of a male character rather than a female as I had originally thought so it became a grumpy, old man. I painted his skin using acrylics as I had before however, the finish that I was getting here was much smoother and nicer to work with than simply the bare foam. I used variations of colour to help exaggerate features such as his sunken cheeks and large nose. I also gave him large, grey eye brows to help him look fairly old. I made his bed clothes from a tea towel, this reminded me of a shirt my Grandad used to wear so i thought that it would be rather fitting. I also gave this character a night cap as it reminded me of the character scrooge and various other traditional stores and char actions where they are often pictured wearing something similar. I added small buttons and a little pocket on his left hand side to make it look more authentic.
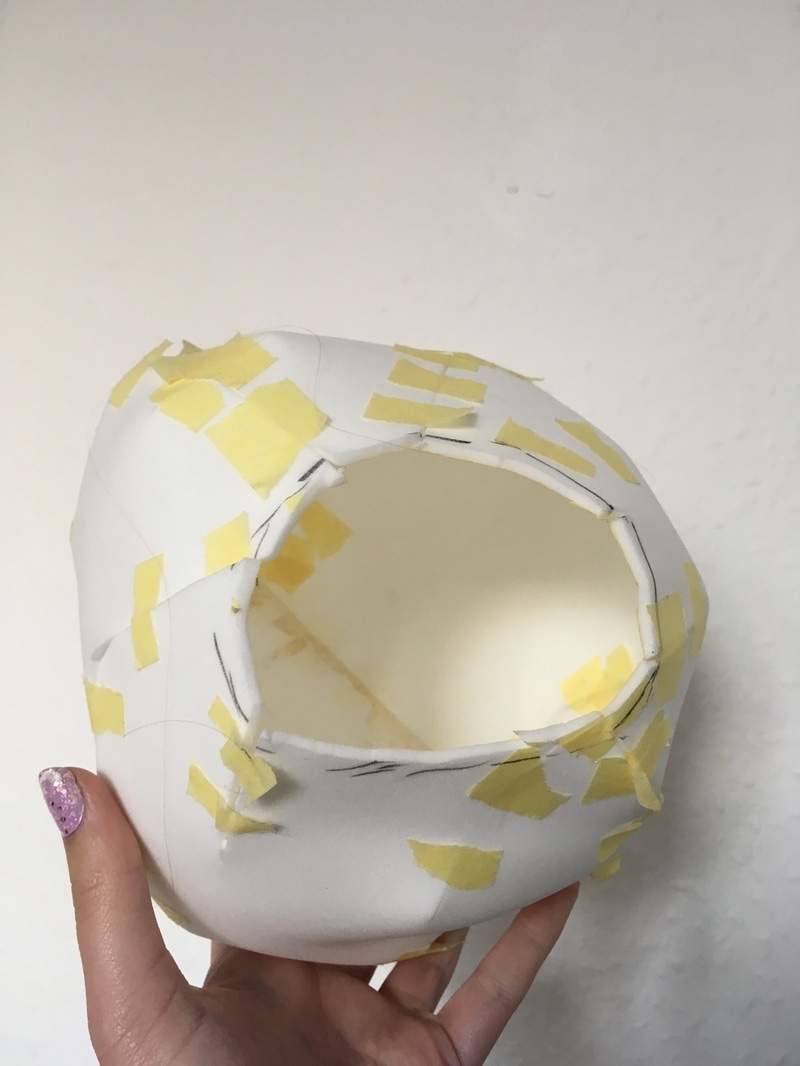
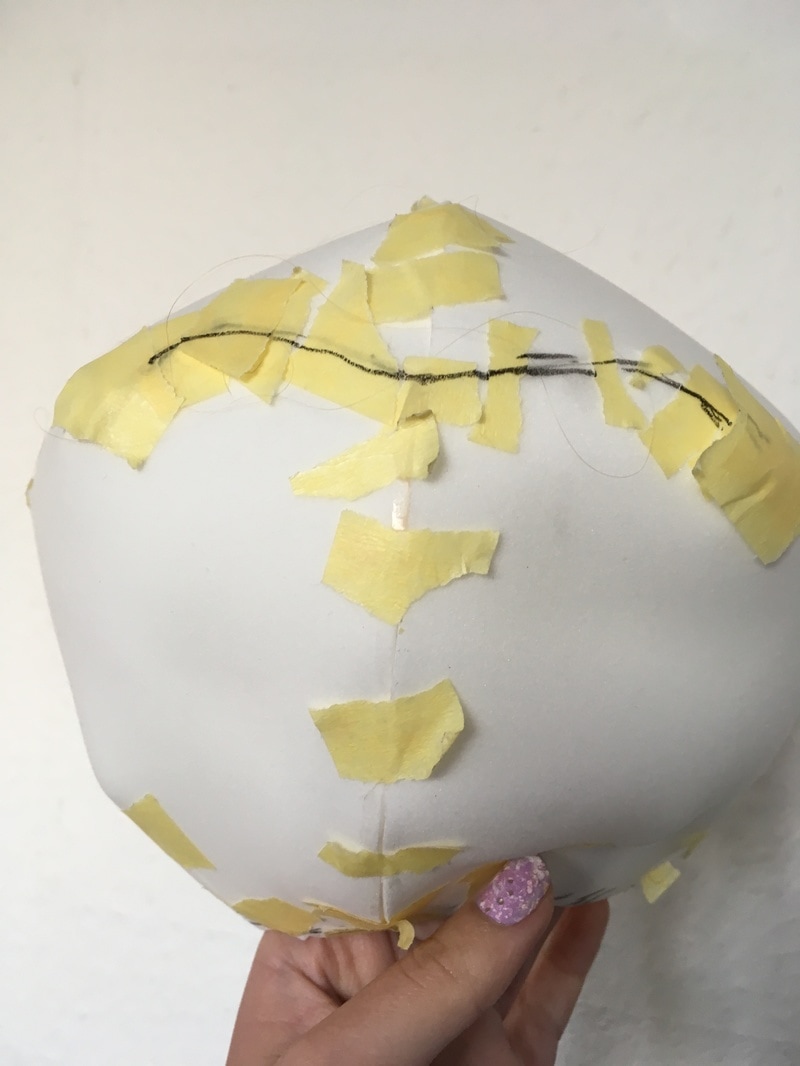
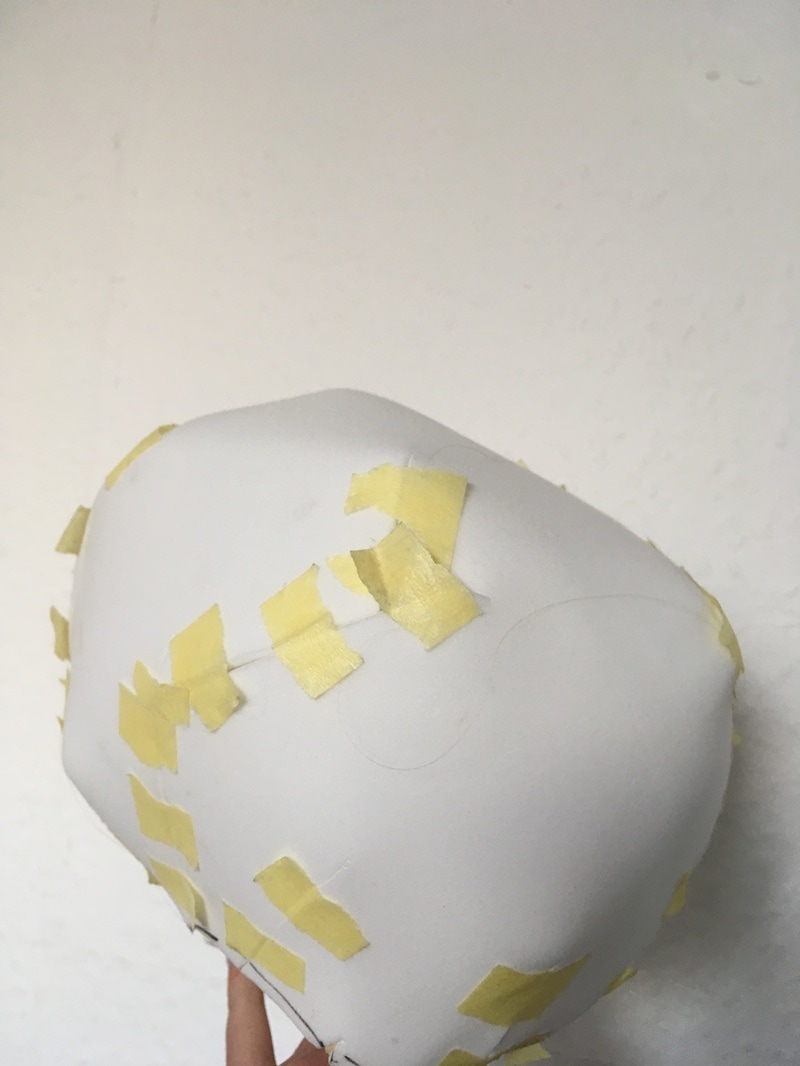
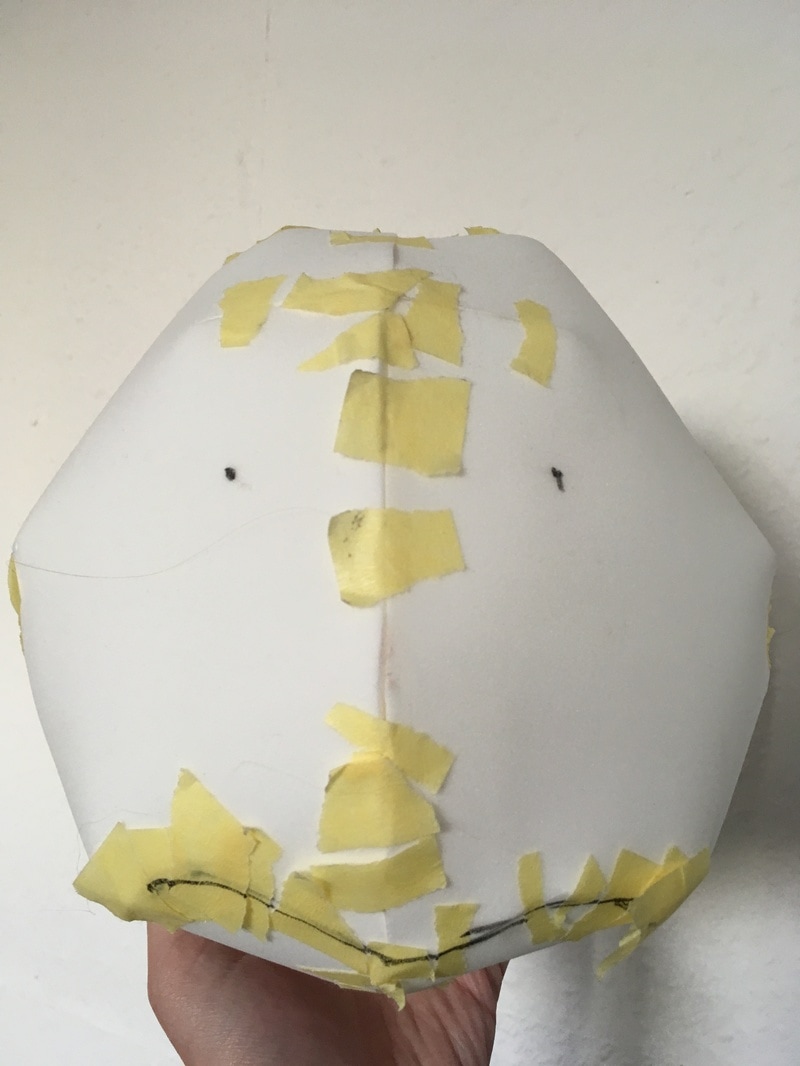
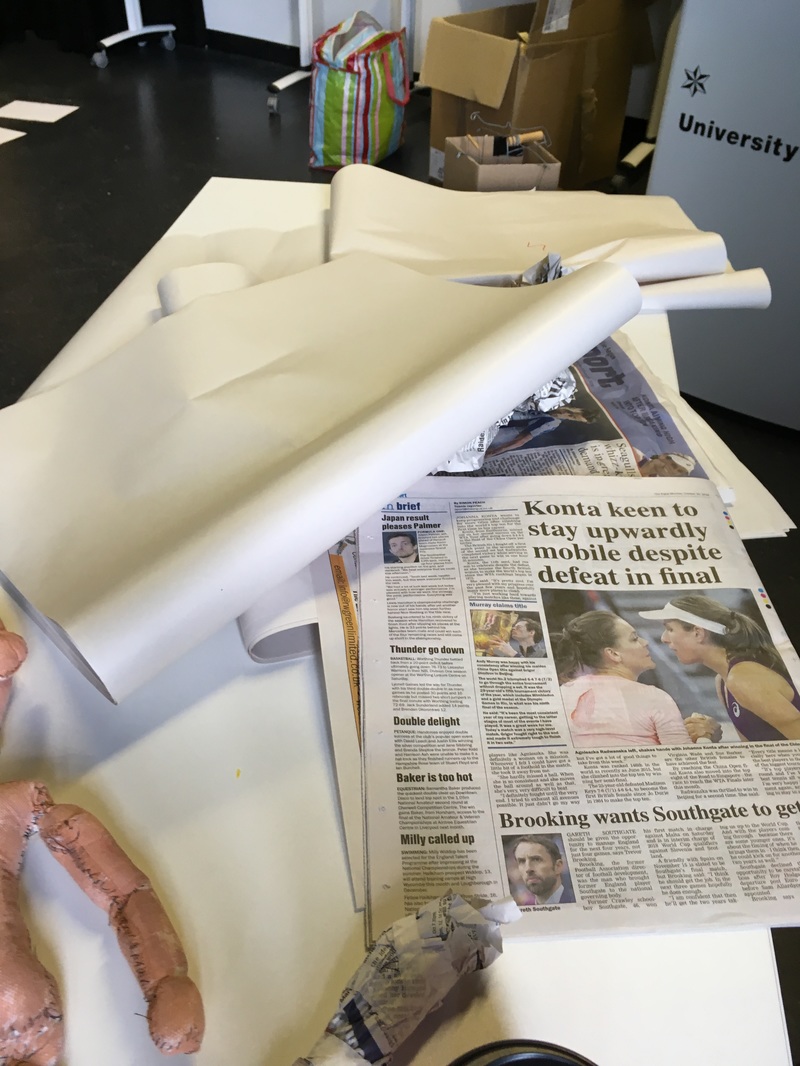
To create my net based puppet I began by slotting two oval pieces of card together so it looked like a cross section of a head. Then, I cut thin strips of cardboard (making sure the the corrugated lines ran against the direction of the strip) and wrapped them around the oval shapes, securing them with masking tape. We were to try and add the necessary contours and to get the general shape of the 'head' symmetrical . I found this difficult; the face I decided to try and create was fairly complicated and had a very large nose to it was hard to get the cardboard to bend and then stay in the ways I needed it to. Another problem I encountered was that I couldn't layer up the strips of cardboard too much or it would begin to distort the shape. The way I tried to solve this was by cutting strips that were overlapping each other and then re-attaching them with masking tape so the contour was smoother. Sometimes, I found that entire strips could be removed as others took their places. Towards the end of this first stage, I began to get quite confused as to what piece was attached where and how I could regain the shape of the head that I originally wanted. Eventually, I was happy with what I had and started on the next stage. The second stage of this puppet was to create a net for it. To do this, I used sugar paper which I then wrapped around the 'head' that was made out of the cardboard from earlier. Using scissors to make darts and cut away the unwanted pieces of paper, I began to form the net for one half of the face, with the idea being that I could use the same net for both the left and right hand sides of the head so they would then become symmetrical. Again, I used masking tape to secure the paper in place as I cut and changed it so that the net would be as accurate as possible. Having created the net, I then drew around it onto a foam sheet and cut this out, making sure the the two pieces were using opposite sides of the net so that they would fit together and I wouldn't have two nets of the same side of the face. The next challenge was to put the nets back together to create the original shape of the face only this time using the foam sheet material. It was at this point, having stuck one side of the face together that I realised that I had lost some of the face contours entirely and the nose was no longer in existence. However, I decided to put the other piece of the net together, stick both of them together and see how I could adapt this to make it work. I decided that I could adapt this net and use it even if it wasn't what I had originally planned. The shape reminded me of something insect like, for example the shape of the head of an ant. Using PVA glue, I glued together the seams between the foam sheets of the inside of the puppets head, whilst this got quite messy, and took a long while to dry, it made it easier to see where I needed to cut the mouth out from when I had removed all of the masking tape and it wasn't falling apart quite so easily.
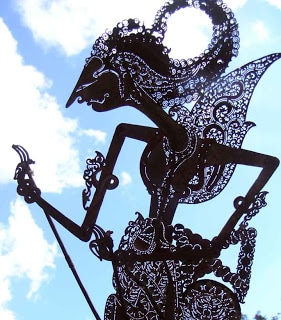
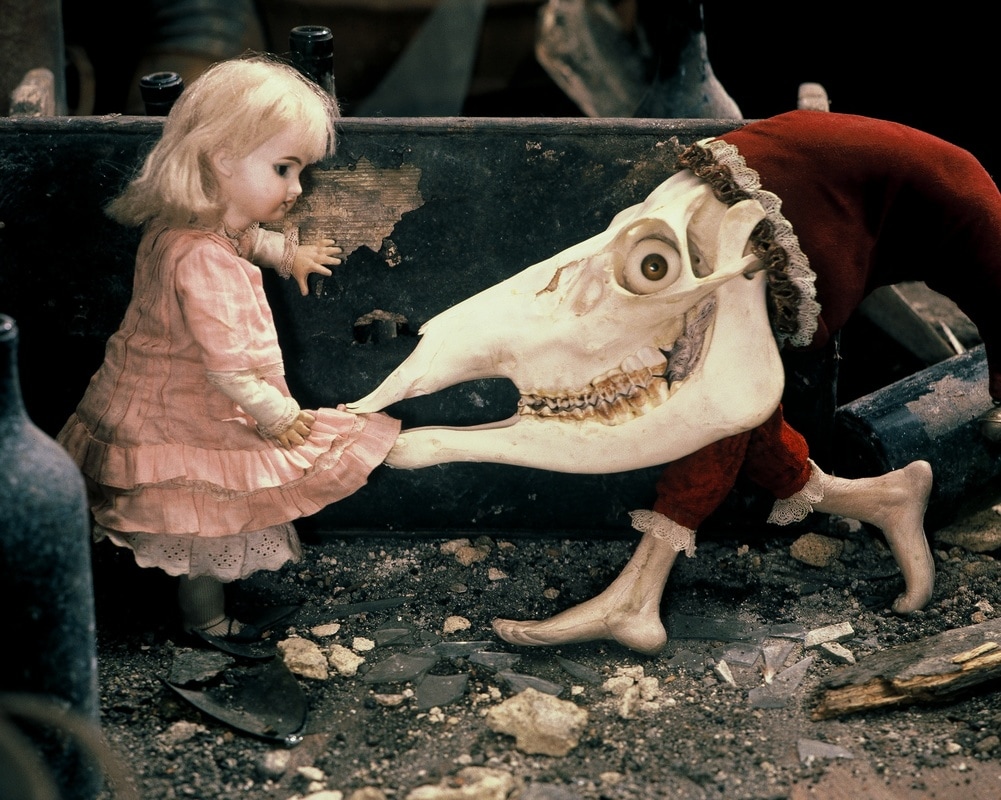 Jan Svankmejer's film 'Alice' uses a combination of real time film and stop motion animation. The puppets used within the film look nightmare-ish, particularly due to the combinations of different parts they each have from a number of different objects. The way that they have been captured also adds to this as the slightly jerky appearnce of stop motion animation give the film a weird dream-like quality. However, I also like the way that Svankmejer has combined real time film with the stop motion animation as it makes you question what is and isn't real within the film.  Originating in Indonesia, Wayang Kulit puppetry is an ancient form of shadow puppetry. The puppets are usually 2d, traditionally made from thin sheets of wood (however, they have also traditionally been made from rawhide), they have intricate designed carved into them which become even more noticeable when being used with the lit background. They are used in-between a screen (typically a thing cloth) and a lighting source (i.e. a lamp) which casts a shadow forward to the audience. Wayang Kulit puppets are used to tell religious tales (depending on the region usually Hindu or Islamic stories) showing good and evil, and are usually there as some sort of educational purpose and have a moral to the story.
1. A story always begins with the norm. Everyday life or what is expected for the characters that are involved. This sets up the story, giving a time, setting and introducing the main characters.
2. The next step is for something out of the ordinary or unusual to happen. This could involve the characters encountering a problem or having to partake in a quest to achieve a mission. 3. The main body of the story is then the characters going on this 'mission' and what they encounter whilst on it, this could involve various other smaller problems and resolutions. There are rising stakes for the characters and changing fortunes. Their back stories are often revealed here. 4. Generally, the climax comes after this. This is where the characters solve the original problem, sometimes through a final fight. 5. As the problems are resolved, this shows the characters returning to normal or the aftermath of what they have just endured and encountered. 6. Finally, life returns back to how it was before, with the problems resolved and a sense of normality.
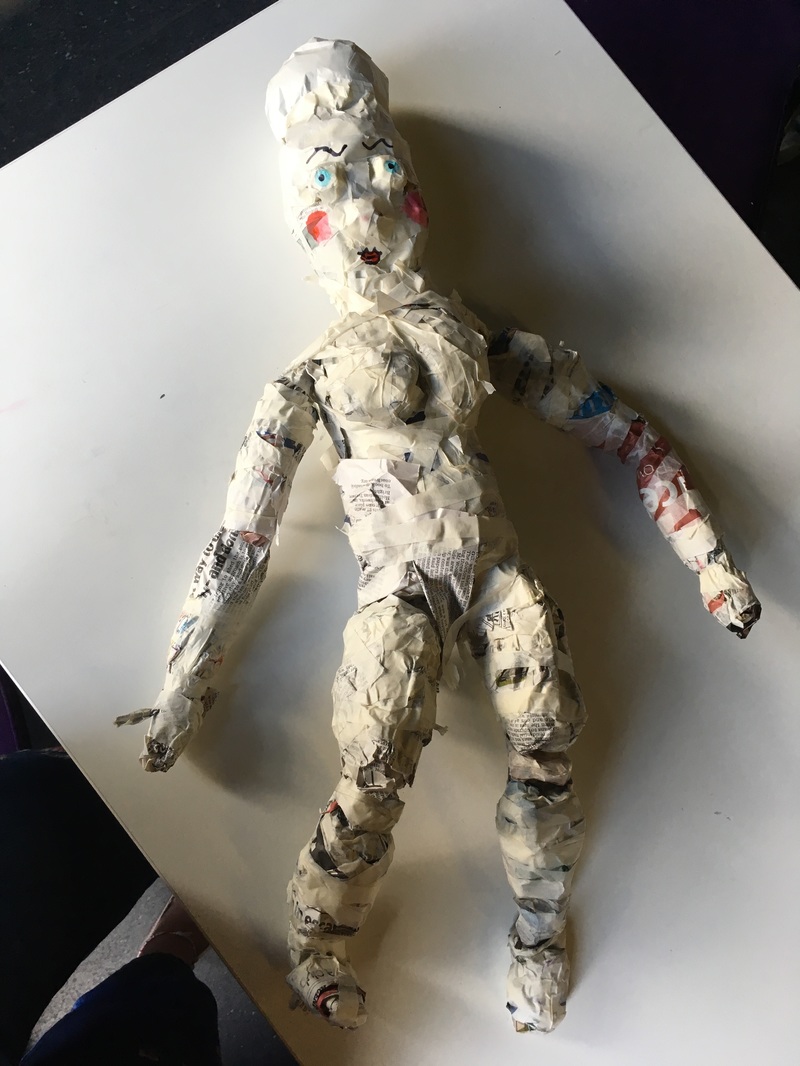
We began to look at the joints on limbs of various different puppets so that we could work out a system of making our own. We found that all of the examples were very similar in the way that they had been made/put together with only varying differences being the shape (i.e. if it was for an arm or a leg) and where the 'stopper' on the joint was which would restrict the movement so that the limb wouldn't bend the wrong way making it more human like. Having studying these examples and seeing how they worker we went onto carving our own limbs out of Balsa wood. Having previously been mainly working with foam, I found the change to carving wood quite challenging. Its a very soft, light weight wood which makes it easy to cut into however this means it is also easy to dent and damage. I personally found it quite difficult to not carve out too much of the wood, it was very easy to slip and due to the layered nature of the wood it if fairly easy to end up peeling an entire layer of the wood off. It took much more practise than the foam carving for me to get an idea of how to do it but it was also very easy to sand down to perfect the shape of the joint so that it was easy to move and didn't stick.    To make my large scale foam puppet, I had to draw on skills that I had previously learnt whilst making the other puppets so far. The mouth of this puppet was made in a similar way to how the mouth of the sock puppet was made; by cutting out some card in an oval shape to fit your hand. The head was made out of three different foam parts, the chin/jaw, the face and the back of the head. I spent quite a bit of time planning this puppet as the character was loosely based on the smaller foam puppet I had made the previous week. However, I found that once I started to carve the puppet out of the foam block, the puppet started to take on its own character so I decided not to follow my original idea so strictly. I spent a very long time making sure that the surface of the foam was smooth once i had carved out all of the general features of the face. This would make it easier to paint or cover during the later stages of the puppet making. Similarly to the smaller foam puppet, I found it hard to really round off the face and I can see, especially now that the puppet is very nearly finished that her head still appears to be quite square. Whilst I carved out her eyes and nose from the original foam block I had to work with, I decided to carve her ears out separately and I thought It would be easier to add them after as for a long time I had to work of the smoothness and shape of the side of the head meaning I was constantly cutting and changing the surface. Having painted straight onto a foam surface before, I decided that I didn't really like the look and want to aim for a smoother looking finish. I decided to papermache the surface of the puppet. This took quite a while to do due to its size and quite a while to dry properly as the foam absorbed the PVA and water. Once it was dry I was able to paint the face and hands which by this point I had also carved and papermached. I decided to make her body and clothing from some material I had at home. I stuffed her body to give her more shape and sewed half way down her arms to create elbows so the arms could be bent and manipulated. I am continuing to work on the finished look on this puppet and I am going to aim to add legs and make the hair more lifelike.
Working with foam for the first time was a challenge. Having been given a block of foam I felt like I didn't really know where to begin, drawing onto the foam felt uncertain as I wasn't sure on how to tackle carving and didn't know yet what could and wouldn't work for it. I found that the sharper the scissors were, the easier it was to make sharp, clean cuts which made adding finer detail to the puppet much easier. To improve this puppet, I could make her head less 'square' looking and she needs another coat of paint however, I think carving her eyes went well and the general area of the foam is very smooth.
I actually found the hands easier to carve than the face as whilst they were quite a bit smaller I now knew and had practiced different ways of manipulating the foam and of how to cut it although once again, like the head, they look quite angular so work could be done to make them become 'rounder' and more 'organic' looking. The next step will be to add 'clothes' to attach the head and the hands of the puppet so that it can be manipulated by a person using the puppet. 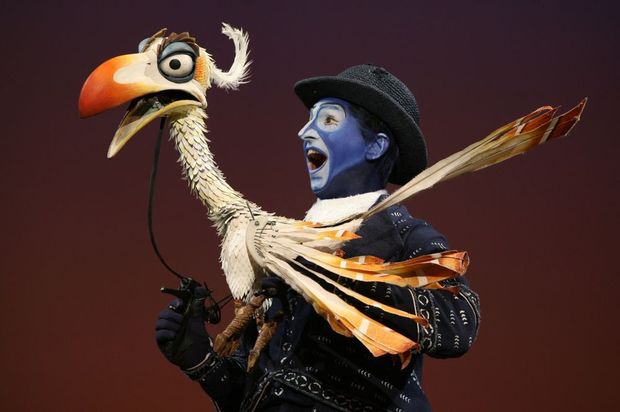 The Lion King, as seen both on Broadway and in the West End features some spectacular masks, puppets and costumes. These were largely designed by Julie Taymor, an American Artist and theatre/film director. When designing the costumes and puppets for The Lion King, she didn't want to be limited to a single style and instead suggested a range of masks, puppets and costumes to create the scene. One type of puppetry used throughout the performances of The Lion King is shadow puppetry. Influenced by Indonesian Wyang Kulit puppetry, the dark, often 2D shapes are lit from behind which makes it appear as a 'shadow' which can then be moved via the puppets joints. Whilst they appear to be very simple, watching them can be quite mesmerising and extremely interesting to watch as you don't necessarily have the detail of a 'normal' puppet and yet they can tell the story just as well.  Some of the puppets used in The Lion King are as big as the performers who manipulate them. For example, the Timon puppet weighs 15 pounds and has to be strapped to the person using it to get the best possible effect as they perform on the stage. There are more than 232 different puppets in the show, ranging from full sized puppets (Such as Timon) to rod puppets and of course shadow puppets. 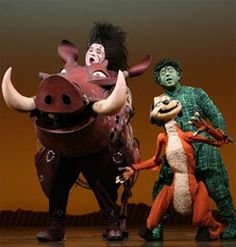
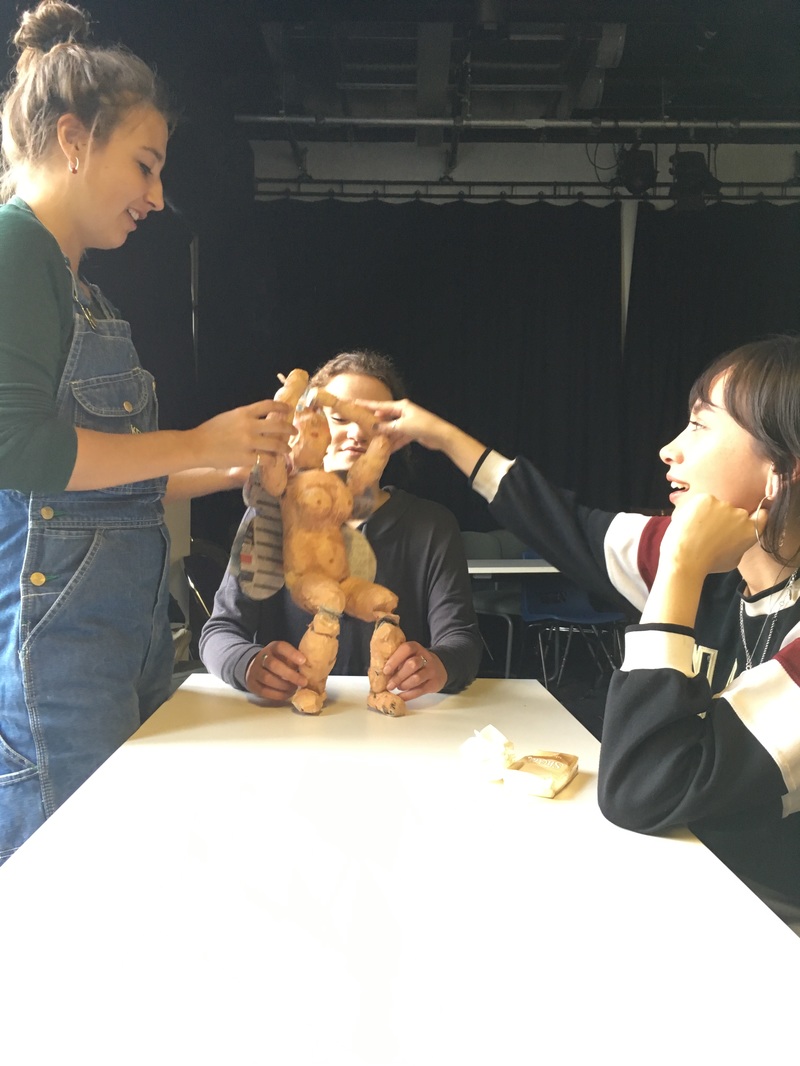
'Bunraku' is a traditional form of Japanese puppet theatre. It involve lifelike puppets that are usually sized between one and four feet tall that are manipulated by a number of performers; these people are sometimes hidden as was done before the 18th century however, it is much more common now to have these perfomers within the view of the audience. The 'principal' puppets are usually manipulated by three people, each of whom are in charge of either the head, the arms, legs or sometimes combinations of these elements. Having made our own versions of these puppets, I can really admire how much work goes into making the movements of the puppets as life like as possible. It takes a lot of co-ordiation and concentration to not only move your own part(s) of the puppet but to also make sure that it works in time with what the other performers as doing at the same time. We really noticed this when we practised making out puppet walk, and we had to watch and pay attention to how we walked ourselves in order to help us understand how we should move the legs of the puppet to make it as life like as possible.

Japan’s Bunraku Puppet from james n schlefer on Vimeo.
|
AuthorWrite something about yourself. No need to be fancy, just an overview. Archives
January 2017
Categories |


 RSS Feed
